1. Perform the repair of the faulty AC parts that were found during the diagnosis process. All AC parts that were replaced during this step should have the correct viscosity PAG oil added to them during installation along with new O-rings, gaskets, and seals. PAG oil is synthetic hygroscopic oil specifically designed for compressors in R-134a systems. The viscosity of the oil can be determined by consulting the service information for the AC compressor brand and type.
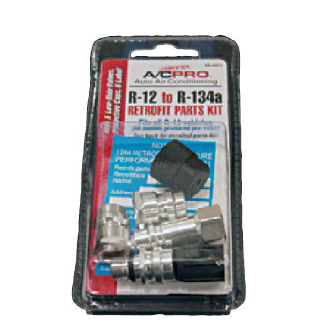
This retrofit kit comes with the service fittings, caps, and the decal. This kit will need to be accompanied with more parts, such as O-rings, gaskets, and seals in order to perform a retrofit that can be relied on for long-term quality
2. If the compressor was not replaced in the previous step, then remove it and drain all of the oil out of it. Add 2 ounces of PAG oil or the amount that was drained previously (whichever is greater) into the compressor. Turn the compressor by hand after adding the oil and then reinstall it.
3. Remove all lines and hoses that were not already replaced in step one. Inspect all hoses for signs of wear or leakage and replace any hoses that do not pass the inspection. Flush all the lines and hoses as well as the condenser and evaporator core if they were not replaced in step one. Add at least 1 ounce of PAG refrigerant oil to the condenser and the evaporator core.
4. Replace all O-rings, gaskets, and seals, and then reassemble each connection except for the metering device.
5. Replace the block thermal expansion valve or the orifice tube, paying attention to lubricating the rubber O-rings and seals with PAG oil.
6. Replace the dryer device while replacing all O-rings, gaskets, and seals.
7. Install the quick-connect adapters onto the Schrader-style service ports that were used for the R12 system. If the new service adapters have Schrader valves or check valves, then the old Schrader valves or check valves must be removed. Having stacked Schrader or check valves can cause the system to leak.
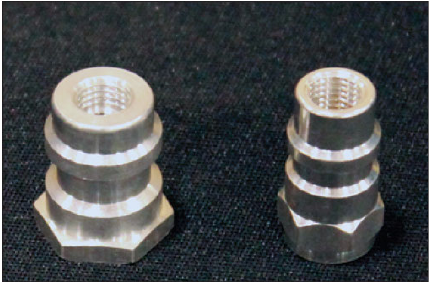
The quick-connect service fittings will be attached to the R12 service ports by screwing them onto the threaded ports. The old Schrader valves must be removed when the new adapters are equipped with Schrader valves to prevent having stacked Schrader
8. If compressed nitrogen is available, then add about 100 psi of pressure to the system to quickly check for any large leaks that may be present. A hissing sound and a loss of pressure will be observed if any large leaks are present. These leaks should be repaired before moving forward in the process.
9. Connect a vacuum pump to the system and evacuate the system for at least 30 minutes. The low side gauge should drop to 25 inches of Hg (mercury) within 10 minutes of vacuum pump run time. If the system does not pull down to a deep vacuum, there is likely a leak that must be found and repaired.
10. Recharge the AC system with R134a to about 85 percent of the original weight. Start the system and test the performance by watching the pressures and duct temperatures.
11. Add the retrofit decal in a visible location under the hood. The decal should give details of who performed the work, and it should list the type and amount of refrigerant and refrigerant oil.

The retrofit decal must be installed in a conspicuous location prior to putting a retrofitted vehicle back into service. The decal provides important information about the AC system for anyone who may service the system in the